Radiant Rainbow Graduation Cake
Highlighted under: Cake Recipes
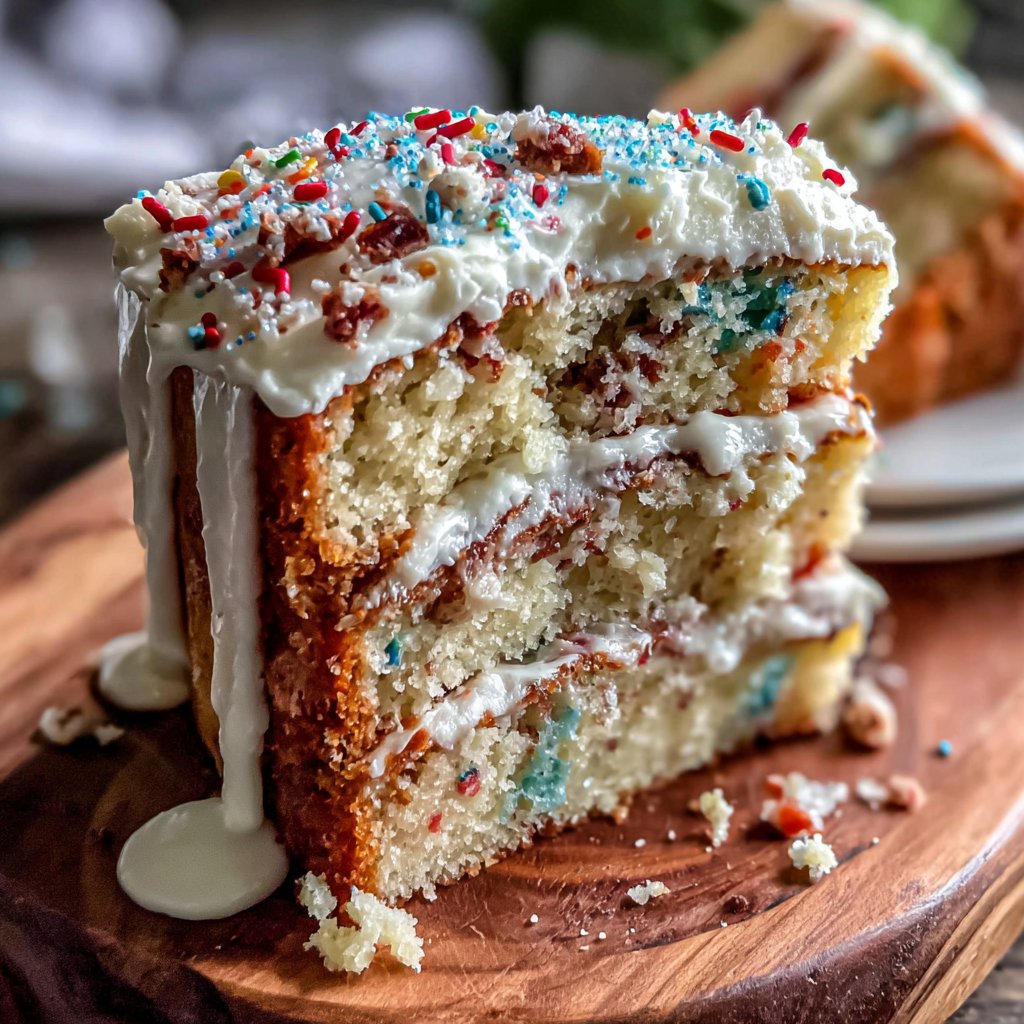
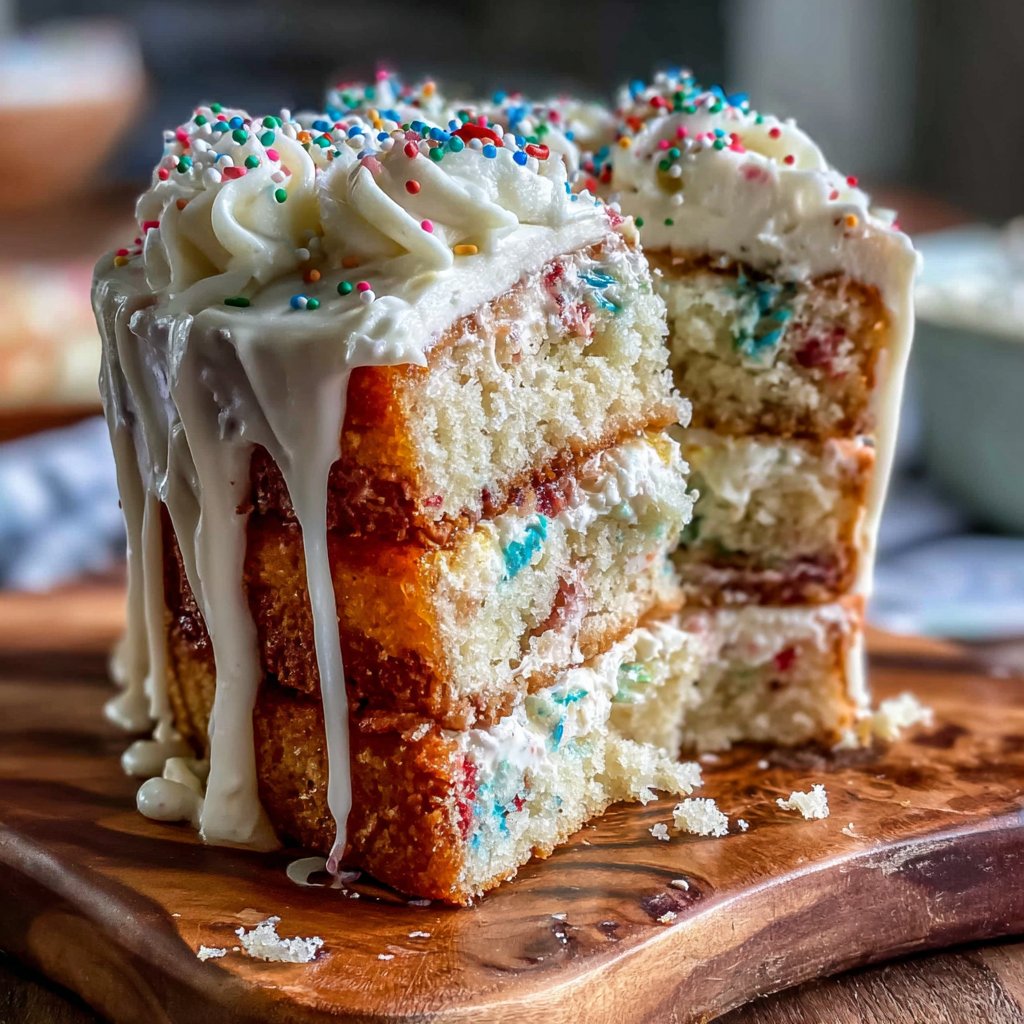
When I was planning a special cake for my friend's graduation, I knew I wanted something vibrant and celebratory. This Radiant Rainbow Graduation Cake was the perfect choice! The layers of colorful cake not only look stunning but also taste amazing. With a fluffy, vanilla-flavored batter and rich cream cheese frosting, this cake is a crowd-pleaser at any celebration. I can't wait to share how easy it is to create this magnificent cake and make your special occasion memorable!
When I first attempted to create this Radiant Rainbow Graduation Cake, I was surprised at how easily the vibrant colors came together. I used gel food coloring, which allowed me to achieve bright shades without altering the cake's texture. I baked each layer separately and stacked them to create a stunning display. Don’t forget to let your layers cool completely before frosting them—this ensures that the frosting stays intact and looks flawless!
In my kitchen, this cake became a true labor of love. Each slice revealed a burst of color, which not only made it visually pleasing but also added to the excitement of serving it. My secret for an extra creamy frosting? Mixing in a bit of sour cream for that delightful tanginess. Trust me, it's worth it!
Why You Will Love This Cake
- Visually stunning with vibrant layers that wow your guests
- Fluffy vanilla cake paired with a creamy, tangy frosting
- Perfectly celebratory for graduations or any special occasion
Mastering the Rainbow Layers
Creating vibrant layers is a key feature of the Radiant Rainbow Graduation Cake, making it visually stunning. When dividing the batter into six bowls for coloring, be generous with the gel food coloring to ensure the colors remain vivid even after baking. I recommend using high-quality gel colors, as they achieve the best results without altering the batter's consistency. Once colored, gently fold the mixture to prevent overmixing, which can result in dense layers instead of fluffy cakes.
As you pour the batter into the prepared pans, keep an eye on the amount in each, aiming for equal distribution to ensure uniform layer heights. A kitchen scale can be a handy tool for this! Bake the layers until they spring back when lightly pressed, and always check with a toothpick in the center to confirm they’re fully cooked. If you notice any cracks on the surface during baking, this may indicate they were overbaked — adjusting the time slightly can remedy this.
Perfecting the Cream Cheese Frosting
The cream cheese frosting is not just decadent but also crucial for balancing the sweetness of the cake layers. It's essential to start with softened butter and cream cheese, as this will create a smooth and creamy texture. If your cream cheese is too cold, you may end up with lumps in your frosting. To ensure a silky mixture, beat them together first before gradually adding powdered sugar and vanilla. Aim for a fluffy consistency; if it's too thick, a splash of milk can loosen it to the right spreadable texture.
I find that adding sour cream gives the frosting an extra tang that beautifully complements the sweetness of the cake. Consider adjusting the amount based on your taste preference; more sour cream will heighten the tanginess while maintaining that creamy, lush quality. Additionally, feel free to experiment with flavor extracts like almond or lemon to give your frosting a unique twist that can enhance the overall experience of the cake.
Storing and Making Ahead
This cake is perfect for making ahead of time, which can alleviate last-minute stress during your celebrations. Once baked and cooled, wrap each layer tightly in plastic wrap, and store them in the refrigerator for up to three days. If you need to freeze them, place the wrapped layers in an airtight container, where they can last for up to a month. To thaw, leave them in the refrigerator overnight before assembly to ensure they are easily manageable.
When it comes to decorating, you can choose to frost the cake a day in advance. Just keep it in the fridge, covered, to preserve its freshness. Let it come to room temperature before serving for the best flavor and texture. If you have any leftover cake, store it in an airtight container at room temperature for up to two days. A slice of this vibrant cake pairs beautifully with a cup of coffee or tea, making it perfect for a delightful afternoon treat!
Ingredients
For the Cake
- 2 ½ cups all-purpose flour
- 2 ½ tsp baking powder
- ½ tsp salt
- 1 cup unsalted butter, softened
- 2 cups granulated sugar
- 4 large eggs
- 1 tbsp vanilla extract
- 1 cup milk
- Gel food coloring (red, orange, yellow, green, blue, purple)
For the Frosting
- 1 cup unsalted butter, softened
- 8 oz cream cheese, softened
- 4 cups powdered sugar
- 1 tsp vanilla extract
- 2 tbsp sour cream
Optional Decorations
Sprinkles, fresh fruits, or edible flowers.
Instructions
Prepare the Cake Layers
Preheat your oven to 350°F (175°C). Grease and flour six 8-inch round cake pans. In a bowl, combine flour, baking powder, and salt. In another bowl, cream together butter and sugar until light and fluffy. Add eggs one at a time, then stir in vanilla. Alternate adding flour mixture and milk to the butter mixture, starting and ending with flour.
Color the Batter
Divide the batter into six bowls. Add gel food coloring to each bowl to create desired colors: red, orange, yellow, green, blue, and purple. Mix well until colors are vibrant.
Bake the Layers
Pour each colored batter into the prepared pans and bake for 25-30 minutes until a toothpick comes out clean. Let them cool in the pans for 10 minutes before transferring to a wire rack.
Make the Frosting
In a mixing bowl, beat softened butter and cream cheese together until creamy. Gradually add powdered sugar and vanilla, blending well. Stir in sour cream for added richness.
Assemble the Cake
Once the cake layers are completely cool, spread a layer of frosting between each layer, stacking them in rainbow order. Frost the top and sides of the cake. Decorate with sprinkles or fresh fruits.
Chill the cake for about 30 minutes before serving to make slicing easier.
Pro Tips
- For the best results, ensure all ingredients are at room temperature before starting. Use gel food coloring for the brightest colors, and always bake your layers separately for even cooking.
Layer Variations and Customizations
While the classic rainbow colors are stunning, feel free to experiment with different color combinations or even use flavors for each layer. For example, infuse a hint of citrus zest into the yellow layer or a splash of almond extract in the purple layer for a delightful twist. You could also use natural colorings, such as beet juice for red or matcha powder for green, to create a more earthy palette, making it a fun art project while remaining mindful of your ingredients.
For a special touch, consider adjusting the thickness of your layers. If your guests enjoy a more decadent experience, bake two thicker layers instead of six thin ones and slice each in half horizontally when cooled. This will allow for more frosting in each bite, enhancing the cake’s texture and flavor dimensions.
Troubleshooting Common Issues
If the cake layers domed too much during baking, gently slice off the tops with a serrated knife when they have cooled, ensuring a flat surface for stacking. Uneven layers can lead to difficulty in frosting and presentation, which can feel disheartening especially for a celebratory cake. Keeping an eye on the baking time and temperature will help achieve perfectly leveled cakes, so consider investing in an oven thermometer if your oven runs hot or cold.
Sometimes, the frosting may not spread as smoothly as desired. If it feels too thick, add a splash of milk or more sour cream in small increments while mixing until you reach the perfect spreading consistency. Conversely, if it's too runny, a little more powdered sugar can help firm it up without compromising flavor. Adjusting these details can help achieve a bakery-level finish right at home!
Serving Suggestions
When serving your Radiant Rainbow Graduation Cake, a simple garnish of edible flowers adds an elegant and joyful detail that makes it feel even more special. Fresh berries or a drizzle of fruit puree can enhance the visual appeal and flavor profile, complementing the sweetness of the layers. Consider using seasonal fruits that reflect the time of year to give it a personal touch.
If you're looking to serve this cake at a large gathering, slicing it into small, manageable pieces can make it feel less overwhelming. Pairing it with a scoop of vanilla ice cream or whipped cream might elevate the experience even more, offering a delightful contrast to the cake's texture. Guests will appreciate the combination of flavors and the festive vibe this cake brings to your celebration!
Questions About Recipes
→ Can I use other flavorings instead of vanilla?
Absolutely! You can experiment with almond extract or other flavored extracts for a unique taste.
→ How do I store leftover cake?
Store leftover cake in an airtight container in the fridge for up to 3 days.
→ Can I freeze the cake layers?
Yes, you can freeze the baked layers, wrapped tightly in plastic wrap, for up to 2 months. Thaw in the fridge before frosting.
→ What can I use instead of cream cheese in the frosting?
You can substitute with mascarpone cheese for a different texture or use a buttercream made with only butter and powdered sugar.
Radiant Rainbow Graduation Cake
Created by: The Chefnoahfoods Team
Recipe Type: Cake Recipes
Skill Level: Intermediate
Final Quantity: 12 servings
What You'll Need
For the Cake
- 2 ½ cups all-purpose flour
- 2 ½ tsp baking powder
- ½ tsp salt
- 1 cup unsalted butter, softened
- 2 cups granulated sugar
- 4 large eggs
- 1 tbsp vanilla extract
- 1 cup milk
- Gel food coloring (red, orange, yellow, green, blue, purple)
For the Frosting
- 1 cup unsalted butter, softened
- 8 oz cream cheese, softened
- 4 cups powdered sugar
- 1 tsp vanilla extract
- 2 tbsp sour cream
How-To Steps
Preheat your oven to 350°F (175°C). Grease and flour six 8-inch round cake pans. In a bowl, combine flour, baking powder, and salt. In another bowl, cream together butter and sugar until light and fluffy. Add eggs one at a time, then stir in vanilla. Alternate adding flour mixture and milk to the butter mixture, starting and ending with flour.
Divide the batter into six bowls. Add gel food coloring to each bowl to create desired colors: red, orange, yellow, green, blue, and purple. Mix well until colors are vibrant.
Pour each colored batter into the prepared pans and bake for 25-30 minutes until a toothpick comes out clean. Let them cool in the pans for 10 minutes before transferring to a wire rack.
In a mixing bowl, beat softened butter and cream cheese together until creamy. Gradually add powdered sugar and vanilla, blending well. Stir in sour cream for added richness.
Once the cake layers are completely cool, spread a layer of frosting between each layer, stacking them in rainbow order. Frost the top and sides of the cake. Decorate with sprinkles or fresh fruits.
Extra Tips
- For the best results, ensure all ingredients are at room temperature before starting. Use gel food coloring for the brightest colors, and always bake your layers separately for even cooking.
Nutritional Breakdown (Per Serving)
- Calories: 400 kcal
- Total Fat: 25g
- Saturated Fat: 15g
- Cholesterol: 80mg
- Sodium: 120mg
- Total Carbohydrates: 50g
- Dietary Fiber: 1g
- Sugars: 35g
- Protein: 4g